Hi guys so today I am doing another favourites blog, I am going to try to go a favourites blog every month if I am able to as my favourites may not change. I will try to do one of these every season so i can vary the type of things put it them.
Sunday, 29 December 2013
Monday, 23 December 2013
Christmas nails day 7
Snow Men Nails
These snow man are so cute but as usual you do need a dotting tool and a black nail art pen sorry guys, I am trying to do some tutorials where you do not need any special things! I promise!
Any way so along with those tools you also need a white nail polish and an orange.
Saturday, 21 December 2013
Christmas nails day 6
Penguin nails
I understand that these aren't exactly christmasy but I think they are super cute and go with the cold weather that we have in England!
Friday, 20 December 2013
Christmas nails day 5
Reindeer Nails
These cartoon reindeers are so cute and easy!!!

You will need: a neutral nail polish, a brown, a red and a black nail art pen.
Thursday, 19 December 2013
Christmas nails day 4
Holly Nails
This is a French manicure design with a Christmas twist.

The nail polishes you need for this nail design are:
A neutral polish, a white, a green and a red.
The tools you need are a medium sized dotting tool and a small or extra small dotting tool.
Wednesday, 18 December 2013
Christmas nails day 3
Father Christmas Hat Nails
This is super cute and I think it would look good on young children, that's if they sit still long enough for you to do it!

For this design I used a neutral colour, a red and a white.
I used Wet'n'Wild in French Apricot, 17 in Red and Barry M in matte white.
Christmas nails day 2
Cute Christmas Bow Nails
This tutorial is so cute and can be altered so it does not have to be specifically Christmas theme.
For this I used a glittery silver and a red, I think that these colours are quite christmasy, for the details I used my beloved Barry M nail art pen in black.
Monday, 16 December 2013
Christmas Nails day 1
Easy Christmas tree nails
Every day this week I will be doing Christmas nail tutorials just in time for Christmas I hope you enjoy and remember to ask if you have any requests.
Sunday, 15 December 2013
CHRISTMAS IS HERE!
It is finally December! That means getting out all the decorations from the loft and decorating the whole house in a festive manner, this year we decided to dull it down a bit and go for a small artificial Christmas tree with built in LED lights, by my choice all the baubles on the tree are purple (which is my favourite colour.) Each special decoration means something special to me, the crystal ballerina was given to me when I was little and ever since I have been determined to become a professional ballerina. The other decoration is the newest one to my collection, this was given to my mum at the beginning of December, her friend had it personalised for her and everytime I look at it, it makes me feel happy knowing my mum is still here with me this Christmas.
The fairy lights that are normally decorating a seven foot Christmas tree are this year hung around my room with some blue tac (my amazing DIY skills),We also have some cute little snow man and snowflake window stickers on almost every window in the house.
The pile of presents are for me from my grandparents who are visiting at the moment I cannot wait till Christmas day!!
My cute little Christmas number this year was knitted by my great Nan (my Nan's mum), its a cute little Christmas pudding and I absolutely love it!
My advent calendar this year is filled with Lindor chocolates! My favourite and at the moment I am totally loving their Christmas special I wish they made them all year round!!
And last but not least I decided my cat has been missing out on Christmas so this year I bought her an advent calender filled with her favourite cat treats, she loves me more than ever now...!
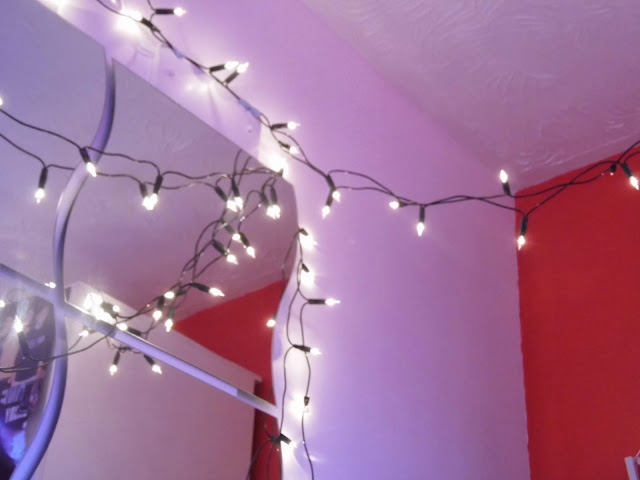


 |
Thats it from me for now I will do a blog after Christmas showing you my presents and maybe do another favourites blog depending on what presents i get, so bye for now Love you xxx |
Saturday, 7 December 2013
1D Day review

My 1D Day experience was probably similar to most of the entire world. before it started I prepared my self with a bit a light reading with multiple magazines.

Then I sat back and admired my shrine.
OBSESSED? Erm no.

I had stocked up the day before so I knew I wouldn't be starving however I did go through those two bars of chocolate whilst waiting for it to start.

I had my twitter open throughout the live stream tweeting non stop and keeping a special eye on the +One Direction official twitter page.

When this finally came up I think my heart actually stopped, and when it finally started I don't think I moved for around seven hours!

When my favourite professional fan girl +Tyler Oakley came on and did a unique interview with Zayn and Louis I was so excited even though for me as I am in England it was about half past one in the morning!

The final game was the best bit for me, those lucky lucky girls!!

When the boys did my modeling! Omg just look! The feels!!
 |
The lilac hair was too much to cope with, kinda wish he kept it to be honest but oh well.
Over all I think one direction day should be made an annual thing, I enjoyed it so much even though it meant that I had to stay awake till 3 o'clock in the morning !!
I'm sorry if you are not a directioner but I promise this will be my last blog entirely based on them, well I will try anyway.
Bye for now
love you xx
|
Friday, 6 December 2013
DIY nail design using tape
This is another tutorial for those who are just starting out with nail art. You do not need any special tools or equipment for this nail design all you need is every day house hold sellotape and scissors.
It is really simple and really easy and you can change the colours to what ever you want.
If you want to glam things up a bit you could use a glitter polish for some sparkle.


This design is so quick and simple, you can move the tape around and put it in different places to change the effect, you could also do a modern french manicure, use a light/pale pink as the base colour then when you apply the tape move it further it and paint the white on top EASY!
I really want to see what you guys come up with so don't forget to tag me on twitter, have fun!
Bye xxxxx
It is really simple and really easy and you can change the colours to what ever you want.
If you want to glam things up a bit you could use a glitter polish for some sparkle.
For this design I used a pink and a purple nail polish

Step 1
Paint your lightest colour on as the base colour, wait for it to fully dry before moving onto step 2.
Step 2
Cut a piece of tape and use the corner, stick it on the bottom of your nail with the corner facing up

Step 3
Paint the second colour over the bits not covered with tape, go onto the tape when painting to achieve a better line.
Step 4
Peel off the tape after about a minute. when fully dry apply a top coat
This design is so quick and simple, you can move the tape around and put it in different places to change the effect, you could also do a modern french manicure, use a light/pale pink as the base colour then when you apply the tape move it further it and paint the white on top EASY!
I really want to see what you guys come up with so don't forget to tag me on twitter, have fun!
Bye xxxxx
Sunday, 1 December 2013
Lace nail designs
This nail design is so cute and can be worn any where, you can change the colours to match an outfit, these cute girly nails can be achieved in these easy steps.


What you will need
 |
For this I used a nude nail polish and a light pink glittery nail polish, you also need a black nail art pen, mine is the Barry M one.
|

Step 1
Paint your base colour on, I used the neutral colour.
Step 2
Using the other colour sweep to bush along the top corner of the nail, like shown.
Step 3
Using the black nail art pen draw a line along where the two colours meet
Step 4
To do the small details of the lace draw some lines vertically and horizontally using the nail art pen.
Step 5
To finish off just draw some semi-circles along the line, when it is dry cover with a top coat and you are finished
This design is simple, easy and cute, you can use different colour variations, I would love to see what you guys come up with so remember to tag me on twitter or instagram
Love ya bye xxxx
Subscribe to:
Comments (Atom)